
Cancel a mobile service
Cancel immediately or schedule cancellation while understanding the effect on the number and access.
Before you start
- Account management permission
- Confirmation that the number is no longer needed
Cancellation can permanently disconnect the mobile number. Transfer the number first if it must be retained.
Open the service
Confirm the mobile number and assigned user, then choose Cancel service.
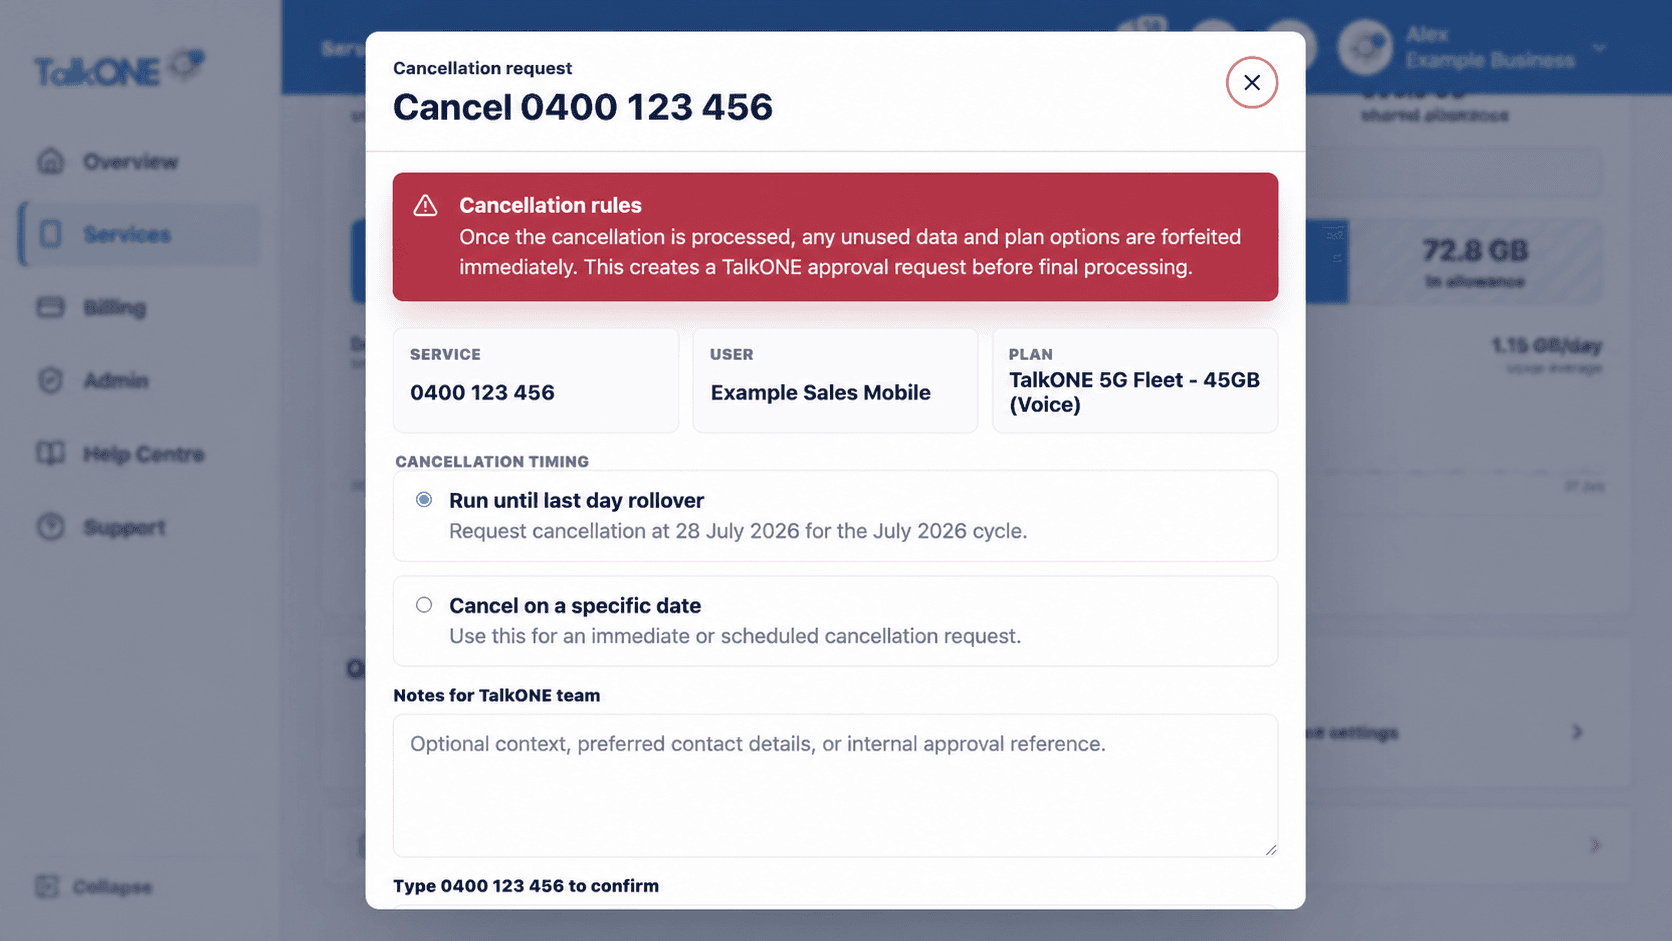
Use the highlighted service being cancelled on the Cancellation request screen. Confirm the surrounding service or account details match before you continue.
Choose the timing
Immediate cancellation begins straight away. Scheduled cancellation keeps the service active until the displayed date.
Use the highlighted cancellation timing on the Cancellation request screen. Confirm the surrounding service or account details match before you continue.
Read the number warning
If you want to keep the number, transfer it before cancellation. Cancelling first can cause the number to be lost.
Use the highlighted Cancellation rules on the Cancellation request screen. Confirm the surrounding service or account details match before you continue.
Confirm with the security check
Complete the portal's account security confirmation and submit the request.
Use the highlighted confirmation number field on the Cancellation request screen. Confirm the surrounding service or account details match before you continue.
Track the request
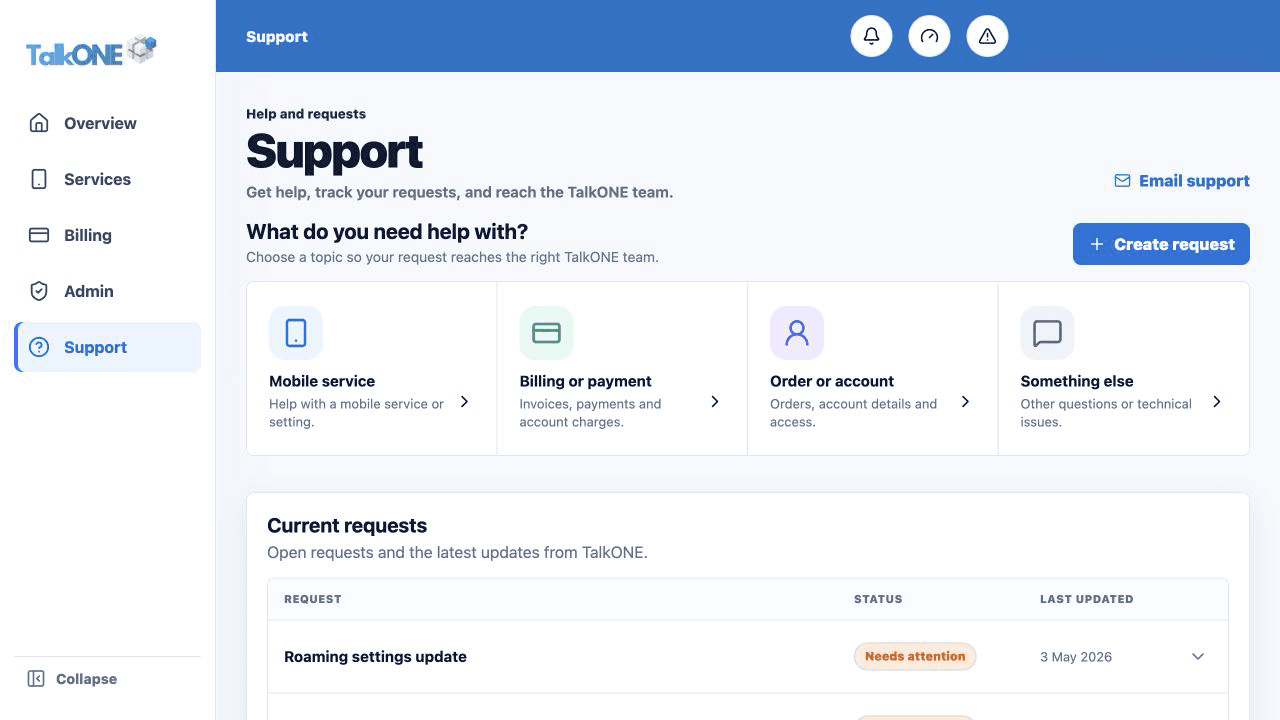
Use Support and email notifications to follow the cancellation through processing and completion.
Use the highlighted Current requests on the Support screen. Confirm the surrounding service or account details match before you continue.
Check your work
The service shows a pending cancellation date or a completed/cancelled state.